
Showing posts with label christmas gifts. Show all posts
Showing posts with label christmas gifts. Show all posts
Tuesday, December 4, 2012
Joy Christmas Garland

Thursday, November 8, 2012
Snowman ornament

Saturday, September 10, 2011
Working on projects for my 25 Days of {homemade} Christmas gifts.
I can't believe that it's almost time to start making some homemade Christmas gifts! Last year's projects were so much fun to make and I have started planning for this year. There will be some new projects this year, and some returning from last year. If there is anything that you would like to see made this year, or any tutorials for certain projects, please let me know! I would love to work on some stuff that my readers are interested in!!
I hope to also post 13 Days of Halloween projects. I have the some new DCWV halloween paper that I am looking forward to using!
That's what is on my to-do list right now. Maybe I should go get started!! Happy crafting!

I hope to also post 13 Days of Halloween projects. I have the some new DCWV halloween paper that I am looking forward to using!
That's what is on my to-do list right now. Maybe I should go get started!! Happy crafting!
Monday, December 13, 2010
25 Days of {homemade} Christmas Gifts-Day 25 gift card holders


Some people don't like to give gift cards because it seems too impersonable. But you can always make a gift card holder to make it alot nicer. I used this template by the fabulous Gina K. for today's gift.
Here is where you can find her template for this gift card holder.
There are so many gift card holders that you can easily make. You can always Google homemade gift card holders and find one you like. Mine was supposed to have a Michael's gift card in it, but due to the winter weather that came through, I had to use an old grocery store card in it! But before I send this one to a lucky follower, I will make sure that I put in the right gift card!
Today is the last day of my 25 days and the last day for your chance to win the Michael's gift card. Leave a comment on any of the posts and I will draw a name on Wednesday! I hope you have found some inspiration in these projects and that you have a wonderful Christmas! Happy holiday crafting!
Saturday, December 11, 2010
25 Days of {homemade} Christmas Gifts-Day 24 recipe book

Today's project is a simple little recipe book that started with some recipe cards from the dollar bins at Michael's. The hardest part of this project was deciding what yummy recipes to put in it!
For this project, I used the following supplies;
recipe cards
hole punch
binder rings
scrapbook paper
craft knife
adhesive
chipboard
stickers, punches, or other stuff to decorate the cover
ribbon
Start by covering your chipboard with the scrapbook paper. Use your adhesive and then trim using your craft knife.

Punch holes in your cover and recipe cards.

Then decorate the front of your cover.

When you are finished, use your binder rings to attach the books. Add ribbon to your rings and you are all done!
Don't forget to leave a comment for a chance to win a Michael's gift card! Happy holiday crafting!
Friday, December 10, 2010
25 Days of {homemade} Christmas Gifts- Day 23 wooden blocks

Today's project is are decorated wooden blocks. I saw a similar set of some wooden blocks at a store for about $15. I made these for free since I was able to raid my hubbys scrap wood stash! I made the JOY since I had three blocks, but you could do anything, Welcome, a last name, or a baby's name for their room!
For this project I used;
wood blocks
scrapbook paper and trimmer
Modge Podge
Cricut letters
Martha Stewart branch punch
acrylic craft paint and brush
sandpaper
Start by making sure your blocks are smooth. Use your sandpaper to round off the edges. When you are done, paint your blocks. I didn't paint where my paper is going to be just to save time and paint.

Cut your scrapbook paper to fit your blocks. You can always just paint the entire block instead of using paper. I used a corner punch to round off the edges. Use Modge Podge to glue your paper to the blocks.

Decorate your blocks. I used my Cricut Storybook cartridge to cut out these letters. I also added some branches punched out using the Martha Stewart branch punch.

You don't have to make all the blocks the same. You can alter between two or three designs. Or make them all different! Just make it your own way!
Don't forget to leave a comment for a chance to win a Michael's gift card! Happy holiday crafting!!
Wednesday, December 8, 2010
25 Days of {homemade} Christmas Gifts-Day22 bottle cap magnets

If your like me, I have an abundance of bottle caps at my house. And if you know me, you know that I recycle. What better way to recycle then take something headed for the landfill and give it a new life!
For this project I used the following supplies;
bottlecaps, washed and dried
scrapbook paper
stamps
sticky gems
Glossy accents.
If you remember way back on day 2, I made a bottle cap necklace. For these magnets, you begin by decorating them the same way. Cut out your paper and decorate it however you want to. Use some Glossy Accents inside the cap to attach your paper. If you need to see step by step with pictures, check out Day 2's post.
On the back, attach some craft magnets, and your all done!
If you would like to have this set, please leave a comment telling me and how to get in touch with you. I will pick one person to send them too!
Leave a comment on any post for a chance to win a Michael's gift card. We are almost done with our 25 days, so time is running out! Happy holiday crafting!
Tuesday, December 7, 2010
25 Days of {homemade} Christmas Gifts-Day 21 Cocoa Packet & Gift Card Holder

Today's gift is a super easy way to dress up a gift card!
For this project I used the following supplies;

packet of hot cocoa
scrapbook paper & adhesive
ribbon
punch
hole punch
paper trimmer
Start by measuring your cocoa packet and trim your paper to fit around the packet. Fold it around your packet and glue it together. Once your get that finished, take out the cocoa packet.

Decorate the front. I used some printed paper, snowflake punch, a coffee cup, stamp and colored pencils. Once it's finished, punch a hole in the top of your packet.

Put your ribbon through both holes and use your cocoa packet to push the ribbon down to the bottom and tie a knot.

If you want to make a pocket for a gift card, just cut out another piece of paper and only put adhesive around three of the edges. Insert your gift card! You are all done!!

Don't forget to leave a comment for your chance to win a Michael's gift card! Happy holiday crafting!
Monday, December 6, 2010
25 Days of {homemade} Christmas Gifts- Day 20 Name Plate

Today's project is coming to you late tonight. Someone forgot to turn off her camera yesterday and it needed to charge to post pictures! But tonight's project is another very easy one!
For this project I used;
A frame
scrapbook paper
letter stickers
I cut the scrapbook paper to fit inside the frame. I added my name on the outside of the glass. This way you can change the scrapbook paper as you want! You can always add a favorite phrase or bible verse too. A tip for putting stickers on, use your tweezers and place them on the glass, but barely stick one end down. That way if you need to adjust, you will be able to pull them off without ruining your stickers.
Don't forget to leave a comment for your chance to win a Michael's gift card!! Happy holiday crafting!
Sunday, December 5, 2010
25 Days of {homemade} Christmas Gifts-Day 19 Chipboard letter magnets

This is one of those projects that are quick, easy, and really inexpensive to make!
Supplies for this project were;
chipboard letter (mine were in a set and are 3 inches tall.)
scrapbook paper
Modge Podge and foam brush
magnet sheet
Craft knife
Cover the top of your chipboard letter with Modge Podge and press your paper down on top of it. Use your craft knife to cut away the excess. You can use a piece of sandpaper to smooth out the edges. I left the sides of mine plain but you could always paint the sides. Then add your magnet to the back and you are done! How easy is that?! Use these as a gift, as an embellishment to your gift wrapping, or make a whole set for a kid just learning their alphabet! Much cuter than those plastic letters!
Don't forget to leave a comment for your chance to win a Michael's gift card! Happy holiday crafting!
Saturday, December 4, 2010
25 Days of {handmade} Christmas Gifts-Day 18 Painted Cork tiles

Today's project is a little late, but in my defense, I did spend the day with the family buying Christmas decorations and doing a little decorating at the house. I was able to get this done in about 10 minutes and there are alot you can do with these tiles.
Here are some of the supplies that I used for this project;

A cork tile
stencil
paint
sponge
I made my stencil from the Cricut cartridge Cindy Loo. If you cut your own, make sure you use a heavy cardstock to keep it from curling when you paint. If you don't have a Cricut, look for stencils in the paint department or the t-shirt crafting section. Secure your stencil to the cork tile. I just used some Tombow adhesive.
Don't brush it on or you may get the paint under the stencil.

Remove the stencil and let it dry. My use for this one is to hang on the wall as a memo board. But I have seen other uses for these. Decorate one for a pet's dishes to sit on! Make a mousepad out of one, much better than the boring ones that I have. Or make several and add picture hangers on the back, and let them use it as art! Lots of great ideas for this one, just think outside of the box.
Don't forget to leave a comment for your chance to win a Michael's gift card!! Happy holiday crafting!
Friday, December 3, 2010
25 Days of {handmade} Christmas Gifts-Day 17-Spruced up flower pot

There have been several times that I have given an Amaryllis for a gift. To make it a little more personal it super easy and quick!
For this I used the following supplies;

Flower pot
paint & brush
stamps
ribbon
If your flower can be removed from the terracota pot, then it will be easy to paint with it out. Use the paint brush to paint on your stamps, but not too much paint. A foam or acrylic stamp will be best for this since you can bend them around the pot. If there are any spots on the flower pot that needs to be touched up, use your paint brush. You could also use a stencil and paint pens.

Stamp on your flower pot and let it dry. Add a ribbon and you are all done! Don't forget to leave a comment for a chance to win a Michael's gift card. Happy holiday crafting!
Thursday, December 2, 2010
25 Days of {homemade} Christmas Gifts-Day 16 Decorated Jar

For today's gift, I decorated a jar and filled it with some scented bathsalts. What is great about this gift, is you can fill it with almost anything!
I used the following supplies on this project;
A Mason Jar
ribbon, scrapbook paper
snowflake ornament
tag
hot glue
bath salts or something to fill the jar
To start, I used the circle of the lid as a stencil to cut out the paper on the lid. I added some hot glue to the edge and put the ring back on. I didn't want the person to have to deal with putting the lid back together everytime she opened it.
Then I tied the ribbon and tag around my snowflake ornament and hot glued it to the top of the lid.

I filled the jar with some bath salt. This is very easy to make. There are a ton of recipes on the web, just Google it and find one that you like. Check for the scents in the candle section of your hobby store!
Don't forget to leave a comment for your chance to win a Michael's gift card! Happy holiday crafting!
Wednesday, December 1, 2010
25 Days of {homemade} Christmas Gifts-Day 15, A gift for you!
I am still fussing with the project that I had planned today. It just isn't working for me, LOL! So how about a little giveaway?!?
If you know me, you know I am a movie buff, something my husband turned me into. I have seen lots of Christmas movies, but one is my all time favorite. Take a guess on which one is my favorite. Be the first one to get it right, and I will let you pick one of my projects to send to you. (some have already been given away so I will email you the ones your can choose from!) Here are a couple of clues.
This is not an old movie.
It was filmed during a unusually warm winter and they had to use lots of fake snow.
The movie is partly based on a collection of short stories written for Playboy in the 1960's.
It was filmed in Cleveland, OH and Toronto.
This movie helped inspire the TV show, Wonder Years.
This filmed was released the week before Thanksgiving in 1983 and was mostly out of the theaters by Christmas of that year.
This movie is shown about 12 times on Christmas Day.
Ok, so take a guess, leave me a way to get in touch with you and check back tomorrow and I will have tamed this unruly project! Happy holiday crafting!!
If you know me, you know I am a movie buff, something my husband turned me into. I have seen lots of Christmas movies, but one is my all time favorite. Take a guess on which one is my favorite. Be the first one to get it right, and I will let you pick one of my projects to send to you. (some have already been given away so I will email you the ones your can choose from!) Here are a couple of clues.
This is not an old movie.
It was filmed during a unusually warm winter and they had to use lots of fake snow.
The movie is partly based on a collection of short stories written for Playboy in the 1960's.
It was filmed in Cleveland, OH and Toronto.
This movie helped inspire the TV show, Wonder Years.
This filmed was released the week before Thanksgiving in 1983 and was mostly out of the theaters by Christmas of that year.
This movie is shown about 12 times on Christmas Day.
Ok, so take a guess, leave me a way to get in touch with you and check back tomorrow and I will have tamed this unruly project! Happy holiday crafting!!
Tuesday, November 30, 2010
25 Days of {homemade} Christmas Gifts-Day 14 Reusable tote bag

I absolutely love my reusable tote bags! I take them everywhere and they are good for the environment. But the ones you can buy are not always the cutest. This one is much cuter than any one I have seen in the stores!
For today's project I used the following supplies;

a canvas tote bag
newspapers, lots and lots of newspapers!
a stencil
bleach water in a spray bottle
paper towels
apron and gloves
Iron on gems
Start by putting on your apron and gloves before you start working with the bleach. Lay down some of your newspapers to protect your work surface. Put lots of folded up newspapers inside your bag. They should be all the way across, and all the way from top to bottom. Put your stencil on the bag. I used a freezer paper stencil (cut with my Cricut) but you can use one from the t-shirt craft section. After you get your stencil ironed on or taped to your bag, spray some bleach water on it.

Don't let it pool, use some paper towels to blot up the excess. It will get lighter over time, so give it a couple of minutes before spraying again.

You can see mine starting to get lighter.

Once it's the shade you want it, remove your stencil. I sprayed some more bleach water on the tote to add some spots around the design. Leave the newspapers inside until it's completely dried. Once it dried, I used my iRock to add some gems to it. If you don't have an iRock, look for iron on gems to add to it.

Now your all done! Don't forget to leave a comment for a chance to win a Michael's gift card! Happy holiday crafting!
Monday, November 29, 2010
25 Days of {homemade} Christmas Gifts- Day 13 Personalized Candle

I have been wanting to try this project for a while. It was super easy to make and you can only imagine how many ways you can decorate these!
Here are the supplies I used for this project;
a pillar candle
gift tissue paper
printer paper
tape
printer
scissors
heat gun or hair dryer
ribbon
straight pins
sequins
Trim your tissue paper to fit onto a sheet of printer paper. Tape the top and bottom to your paper. The tissue needs to be close to the color of your candle. My candle was cream and I used white tissue paper.

Make the design or phrase that you want on your computer. I just picked a phrase, but you can use a photo, just print those on regular white paper. Run your tissue paper through the printer. Then trim around your design.

After your done, put the tissue paper on your candle and using your heat gun (or hair dryer) start softening the wax. You will see the paper start to soak up any melted wax. Keep your heat gun moving and try not to over melt it or you will get drips. If that happens, let it cool for a few seconds and then roll it on your table to help smooth it out.

I shortened some straight pins and added some sequins to the side of my candle, and tied a ribbon around it. It's all done!
Don't forget to leave a comment for a chance to win a Michael's gift card! Happy holiday crafting!
Sunday, November 28, 2010
25 Days of {homemade} Christmas Gifts- Day 12, 12 days of goodies tin

I love the idea of this gift, mostly because I would love 12 days of Christmas candy! You can do so much with this little gift, and there are so many different ways you can make it!
For this project, I used the following supplies;
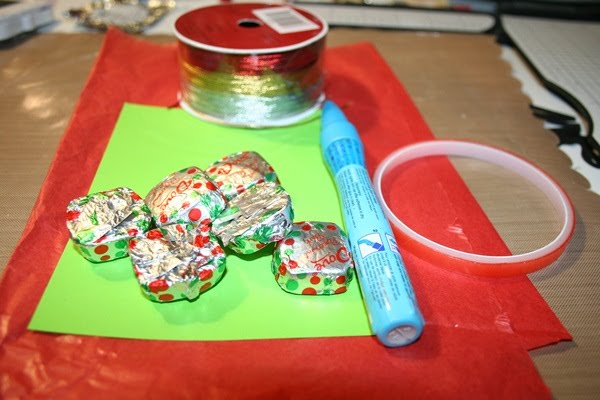
Metal lunchbox
candy
tissue paper
ribbon
tags
scrapbook paper or stickers
tacky tape
and some yummy candy!!
I started by cutting the tissue paper into squares and tying up 12 pieces of candy. I made some numbered tags for the candy and tied them up with some ribbon. I alternated between white and red tissue paper when I put them inside the lunchbox. If you can't find a lunchbox like this one, then you can always just use a Christmas tin or box. If your box is a little too deep for your candy, just use some shredded paper to fill it up a little bit. You can make your own candy, but you may need to use wax paper to keep the tissue paper from getting greasy looking.


I used some Dove peppermint bark candy (oh so yummy) to wrap up, and I just had to have a piece while I was working on this. How appropriate was this wrapper?

After I put the candy inside, I used a Santa gift tag to put on the outside, along with some letters that I cut out with my Cricut. You can always use stickers here. I also added a ribbon along the bottom.
After you finished decorating the outside, you're all done!
Don't forget to leave a comment for a chance to win a Michael's gift card! Happy holiday crafting!!
Saturday, November 27, 2010
25 Days of {homemade} Christmas Gifts-Day 11 Framed vinyl wall quote

Today's project is a cheater homemade gift, but a great on none the less! Alot of people love the vinyl wall quotes, but once you put it up, you can't move it. This is a great way to use seasonal quotes, or be able to take it with you if you move.
For this project I used:
a vinyl wall quote and
a frame from a garage sale that I got for $1!!
hot glue gun
Take the backing off your frame and leave the just the glass. Run a bead of hot glue between the backside of the frame and the glass.

Following the directions on your vinyl wall quote, put it on the front of the glass.
Now your project is all done!
Don't forget to leave your comments for a chance to win a Michael's gift card! Happy holiday crafting!!
Friday, November 26, 2010
25 Days of {homemade} Christmas Gifts- Day 10 a can of pineapple?

Today's project is not so much about the gift, but about the packaging! This is a big hit with tweens, teens, and some grown ups too!
Here are some of the supplies that I used for this project;

A can of pineapple or something else with a pull top
Safety can opener
**I used a Pampered Chef can opener and it would not work with Progresso Soup cans. They have a funny bottom that wouldn't work with my can opener**
scrapbook paper
stickers
glue
ribbon
items to stuff inside
hot glue gun
Use the saftey can opener to open the bottom of the can. Empty everything out and wash and dry your can.

Measure the heighth of your can. Cut your paper wide enough and long enough to wrap all the way around the can. Or if you want to let someone think they are getting a can of pineapple, then leave the label on!!

Decorate the label. I used stickers from a Christmas scrapbook pack, some stamps, ribbon and some sticky gems. Use a heavy adhesive to secure it around the can. Stuff the goodies inside the can. These aren't too big, but if you are giving a gift card to someone, this is a way to make it a little more interesting. Use the hot glue gun to run around the lid and put it back on the can.

Your gift is done! Your friends or family will wonder how you did this when they have to pop the top to get their present! Make sure you leave a comment for a chance to win a Michael's gift card! Happy holiday crafting!
Subscribe to:
Posts (Atom)